Last Updated on June 9, 2023 by Tony Fowler
Connecting your WordPress site has never been easier! What does this mean? You can connect your website simply by using Re:amaze’s interface to handle all the hard work for you. With this update, one-click publish is available for easily setting up cues and the chat widget! Read on to figure out how to use WordPress One-Click Publish for Re:amaze Cues and Live Chat.
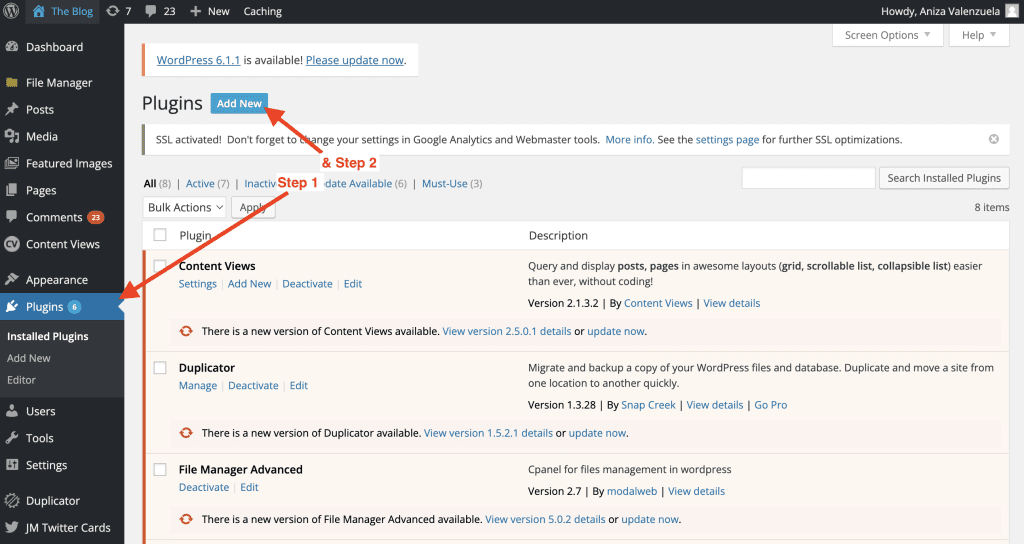
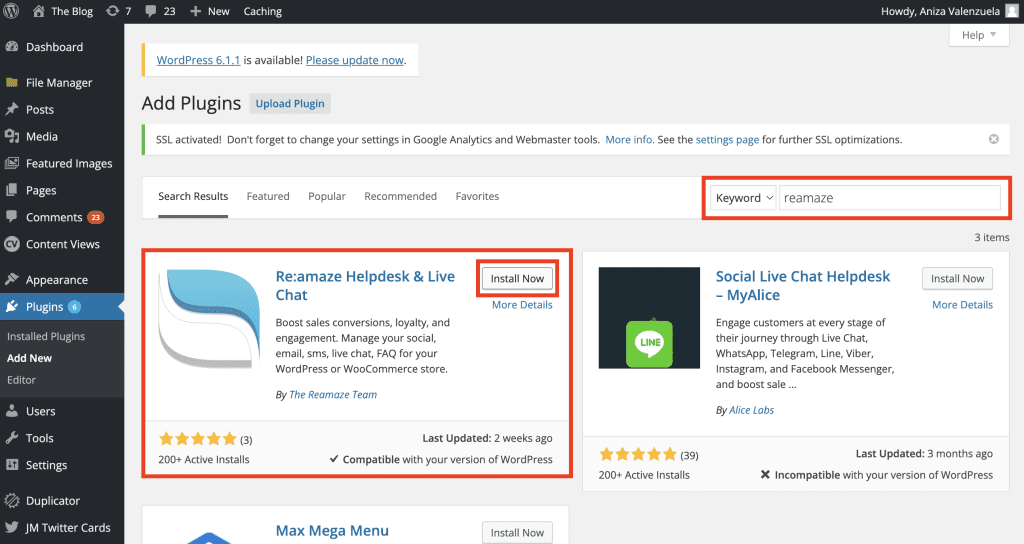
To take advantage of this great update, all you need to do to connect Re:amaze to your WordPress website is download the Re:amaze plugin to your WordPress site. To do this, select “Plugins” on the lefthand column when logged into your website and click “Add New” on the top. Search for “Re:amaze” in the search box, and then click install. Once the plugin is installed, be sure to activate it. After activating it, you can utilize the One-Click Publish feature in the Re:amaze dashboard to publish your Chat Widgets and Cues on your site! Please keep in mind this step is crucial to the seamless functionality of connecting your site to Re:amaze.
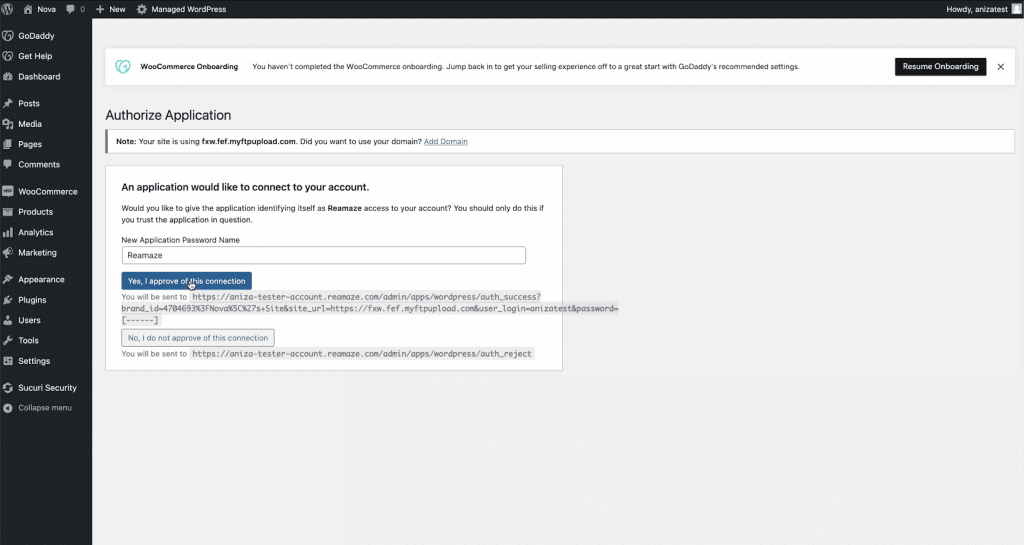
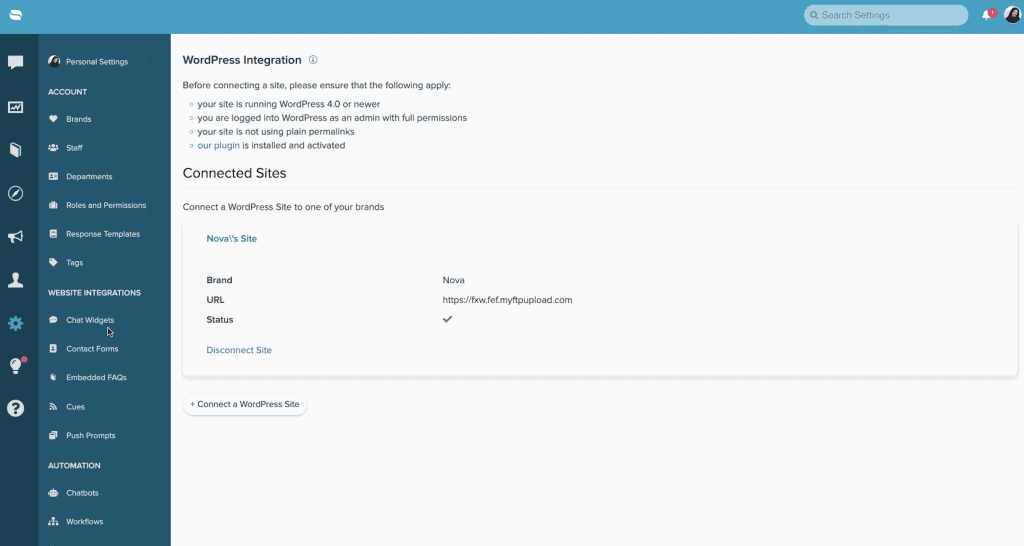
Next, inside Re:amaze navigate to Settings > Apps & Integrations > WordPress. Once you’ve clicked on the WordPress app you will just need to put your WordPress domain, and it should take you into your WP Dashboard. From there, you can select the button “Yes, I approve of this connection” to then connect your WordPress site! Take a look at the short video below to see how you can easily connect Re:amaze to your WordPress site from inside the Re:amaze dashboard!
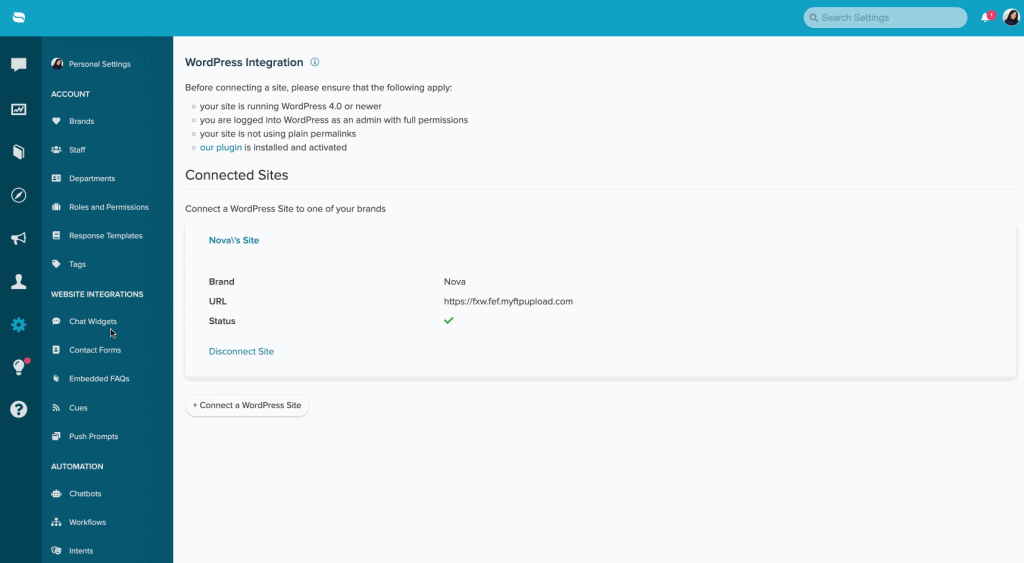
Once you have successfully connected your Re:amaze Brand to your WordPress site you should see the following screen displayed below.
Now for the fun part, you can easily publish a chat widget to your WordPress site in one-click! We wanted to make this process as seamless as possible, and the one-click did just that by eliminating the need to copy+paste the widget code.
After completing the steps above, we can now publish chat widgets and cues! You are able to publish a Chat Widget, straight from your Re:amaze admin dashboard. Go to Settings > Apps & Integrations > Publish to WordPress and voila, your chat is published. To make it as easy as possible, we included another short video continuing on from the one above to show you just how easy this is!
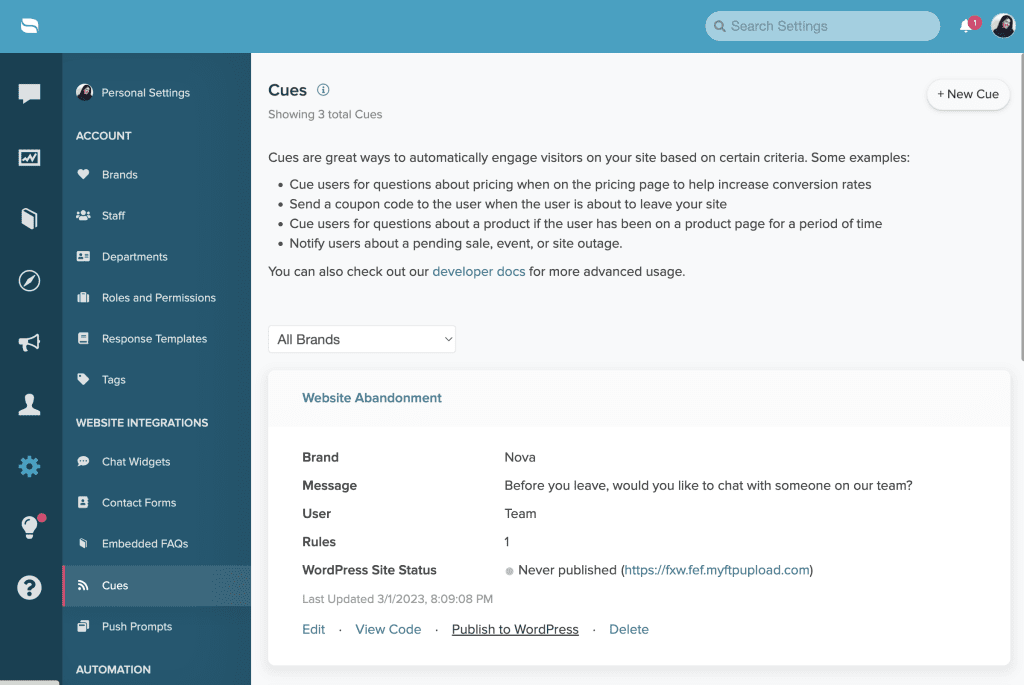
Finally, for Cues you can follow the same instructions that you did to publish a Chat Widget. We want to make sure your Cue is built out and completed, ready to be published. Once you have ensured that is done for your Re:amaze account, you can go to Settings > Cues > Select the Cue you want to publish > Publish to WordPress. You will now have your Cues, and Chat Widget published on your WordPress Sites! For reference, a screenshot of what the ‘Publish to WordPress’ for Cues page looks like is provided below.
For users that have websites through other hosting companies integrating with Re:amaze and installing Live Chat or Cues on your website is still a simple process which you can learn more about here in our Getting Started Guide.


